

Hi Kids! How the heck are all of you and how was your weekend? Did you all have fun? I hope you did! I know I sure did ~take a look at what I was up too...

Remember the bleach bottles? Well here is what I did with them.
I measured how big I would like my basket to be, (ooops gave ya a big tip there)! Then I marked it with a perm. marker and cut.
Now I didn't want to waste any part of this bottle then I had to.
Sooo being the thinker, problem solver, idea person that I am~
I found a use for the remainder of the bottles...

I cut out the shape just right and put it to work. Take a look at what I did...

Yep-a pet food scooper! I thought I was being a good girl scout with that one! LoL!
Now on to my other project. I turned over the bottom of the bleach bottle and outlined it on two pieces of fabric...

Making sure that I included enough room for my seam I added a half an inch around my circle before cutting out the fabric. Can you see how the bleach bottle bottom looks like the beginnings of a basket?

After I cut my "two" bottoms out I measured around the bottle for the "sides" of the basket. again~I made sure to allow an extra half inch for seam.
I wanted to have more then one type of fabric for my design. So I cut out more then one of contrasting fabrics. Then I sewed one of the strips to the bottom circle. Clipped around it to release the fabric so it will lay nicely. Then I sewed the other two strips of fabric together like this...

I wanted to have lace trim on it so I added that. Then after sewing these two fabrics together I folded down an inch of the fabric on the inside of the top end of the fabric, which will become the top of my basket. Remember you have to make two of the exact same fabric covers for your basket. One for the inside and one for the outside.


Once you have sewn the inside and out sides up you can put them on your bleach bottle bottom.
Now my basket is shaping up nicely but I need a handle for it. HHHmmm what can I use?

Did you see that piece of long flexible plastic on the top of the cat litter box? It is that strip you have to peal off to break the seal and open the container. Take a look at how cool this is...

That will make a perfect handle. Except that I want it to match the rest of the basket. So lets cover it and make it all fancy and pretty! I measured it and added for seam allowance. I also added lace to it. I cut two pieces of fabric out attached the lace, sewed it so it had a pocket to slip the handle into turned and ironed my fabric. Then I just slid the plastic handle into it~
easy peasy!

Now I have my basket basically put together. All I have to do is attach the handle and some more trim at the top and hand stitch the inside and out side of the fabric together.
I used a glue gun to attach the handle to give it more support.


I could have used the glue gun to secure the entire top of the inside and outside fabric pieces but I didn't want to. I hand stitched them instead. I felt that would be stronger. But before I did that I made a strip of eyelet for a gathered lacy look. I added that to the top of the bleach bottle bottom with the glue gun...

Of course I had to add one of my "Grammy Labels" to the basket, because this is going to be for my granddaughter! I made this little label what do you think? I thought it was sooo cute that I made it part of the design and added it to the outside for a focal point. I love it!

To fill the basket I colored some eggs and put a touch of hot glue to attach rick rack on the eggs. I think they are so darn cute! But the basket needed something else. I decided it needed a bunny. So I got my fabric out and right sides together I drew a bunny on the back. Cut it out and stitched it up! I of course had to add some character to him so I added some pieces of fabric on his ears, a heart for him to hold and embroidered some details. He came out so cute so~old fashioned! He looks like a vintage handmade bunny~he was fun to make!

For the grass I used matching green calico fabric.
I tore strips of it and tossed it in the top of the basket in and around the eggs. I didn't want to use plastic grass. I wanted to do something different...

It was a blast to color eggs in January!

The whole idea for this project was to encourage recycling or re-using items in our home. Try looking at things around the house and think up new ways to re-use them instead of just tossing the in the trash! I have an idea for the empty cat litter bins too! LoL~That is a project for another time!
And just look at the joy on this little girls face~she loves her new
"FREE" Easter basket!

Well now you have seen my Easter basket with a twist.
Now here is what I did with the other bleach bottle bottom...

I made a basket purse! Isn't it so cute?
Oh I think so and so does Emily jean!
Notice I finished off the tips if the ties with pretty green post buttons.
I found the perfect sparkly square button that just sets it all off!
It is made basically just like the Easter basket.
But I made a pocket for the pull tie in the top.
Put button holes on the front piece of the top of the fabric to pull the tie ends out. And Waaa-Laa! There you have it recycled fabric, and bleach bottles.
I got two scooper's ~one for the dog food and the other for the kitty food, an Easter basket, and a cool purse. Know what else I got? A very happy little girl who melts my heat! Just take a look at her modeling the purse...

And look at this next one~LoL! She has one hand in her pocket~lookin so cool!

Imagine all the possibilities with that little bag. Could be a gift bag made out of any kind of fabric. Bet you all could come up with a hundred different uses.
Well kids I know that was a long post but hey I wanted to be sure and share as much as my project with you that I could.
I would like to challenge you all to recycle or re-use whenever you can.
It is really fun and very worth while! You would be surprised at what you can create when you put your mind to it. So now go to it and do it!!! Lol!
I have to go get busy on some Easter dresses and dress coats! LoL I will post those when they are finished! Some of them are already cut and waiting to be sewn up~ I am using vintage patterns for that.
Thanks for visiting and reading my super, ubber long post!
Have a wonderful week!
Happy Blogging~Big Giant Hugs~Tam :D


Pretty cute! You did a nice job!
ReplyDeleteTam, you are so smart and creative! Who would have thought that you could make such cute things with a bleach bottle?!? Your little granddaughter is a doll, and she's very lucky to have such a crafty grandmother...
ReplyDeleteWow, this is one fabulously creative project! I am so impressed...
ReplyDelete~Emily
What gorgeous projects! You are very talented and creative. I love your blog too! xoxo
ReplyDeleteTam,
ReplyDeleteThanks for visiting, these are wonderful! You could sell these, (or maybe you do). I love your shakers too- (so cute). You look way too young to be a grandma, I keep thinking those are your kids. Best wishes, Cindy
What a brilliant idea! And it turned out so perfectly! And just look at how happy she is...so proud and tickled pink! It must be really fun to have so much creative talent. And thanks for putting my button on your sidebar..and the really sweet comment. I'm grinning from ear to ear!
ReplyDeleteYou are very creative well done l might just have to buy some big bottles and have a go my self ,l cant wait to see your next project.
ReplyDeleteBest wishes Pat
Hi Tam,
ReplyDeleteLOVELY BLOG!!! That little basket is gorgeous!!! I have to make one for my little Granddaughter for Easter!! Have just found your blog from Pat's, & will be back again for sure!!
Happy crafting & have a great weekend!
Sharon xx
What a sweet blog you have! Love the Easter basket and your darling little model!
ReplyDeleteHugs, Maryjane
That is such a great idea, I'll have to make one for Easter. Lovely blog btw.
ReplyDeleteYvonne x
Oh my gosh Tam! How cute and so creative! I love the basket.. but I think I'm gonna steal the purse idea and use it as a holder for those pesky plastic grocery bags I have stuffed in my junk drawer. Thanks for sharing!
ReplyDeleteHugs..
Debbie
That is amazing!! Fabulous work on this project. I love Easter in January...sounds like a fun idea. ;)
ReplyDeleteWhat a cute bunny! And I love the rick rack eggs, they are so sweet. You did such a nice job on this and thank you for the step by step instructions. I may have to try it!
ReplyDelete~Michelle
Hello my dear Tam!! I had so much fun reading the instructions on the basket! I feel like I was there. Hey, your nails look fabulous in the photos too. How did you manage to keep them so nice while weilding the glue gun? It sure is fun to see what you are making next! I send my love and hugs to ya, talk to you soon.
ReplyDeleteGreat recycling! Pretty colors.
ReplyDeleteHi Tam,
ReplyDeleteThis is my first visit to your wonderful blog. Love the basket and purse...you're very talented...thanks for sharing your ideas!
OMG!!! Who would have thought you could go from litter scoop to amazing Easter basket with the SAME bleach bottle! I love your thriftiness and lovely creativity!! You are a wonderful crafter/seamstress and your little gr. girl is so LUCKY to have you to make such great items for her--that purse is adorable as well!!!!
ReplyDeleteThank you for that wonderful share!! Dana
You are just too clever!! What a wonderful idea to have Easter Eggs in January to brighten up the cold months. Happy crafting :)
ReplyDeleteHow crafty are you??? First of all, I love these projects period, but the fact that they start with recycled plastic...YAY, you!! Imagine what you'd be able to do with that floral print thrift coat in my last post, LOL! ;-) The best part of all is the sassy little girl with her hand in her pocket and a new purse. :-)
ReplyDeleteWhat a DARLING basket... and purse! What a fantastic tutorial Tam! Love that it's so "green" too. You have me staring at my big Costco green kitty litter jugs in a new light! Thanks for the great tutorial!
ReplyDeleteme ha encantado el reciclado yo tambien realizo estos proyectos en mi taller
ReplyDeletesaludos
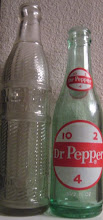
i love the dr pepper bottle find!
ReplyDeleteI just love all your blogs!! How do you ever keep up with everything? You ROCK for sure
ReplyDeletegirl! Blessings Jonnie